Each Auction Nudge tool comes with a set of default themes and options to allow you to choose how it will display on your site. If these options aren’t enough, as Auction Nudge is built using open web standards (HTML – Hypertext Markup Language, CSS – Cascading Style Sheets and JavaScript – a web scripting language) then you can customize the styles yourself by writing some simple CSS rules.
Taking this one step further, the Your eBay Listings tool has an ‘Unstyled’ theme which allows you to start from scratch and specify exactly how you would like every element to display. The following tutorial will run you through the basics of customising the ‘Unstyled’ theme (some knowledge of HTML and CSS is assumed).
Get set up
Once you have either created your code snippet and installed it on your site (or you have the WordPress plugin setup on your site) you should be displaying your current eBay listings on your site. By selecting the ‘Unstyled’ theme, these items should look something similar to this:
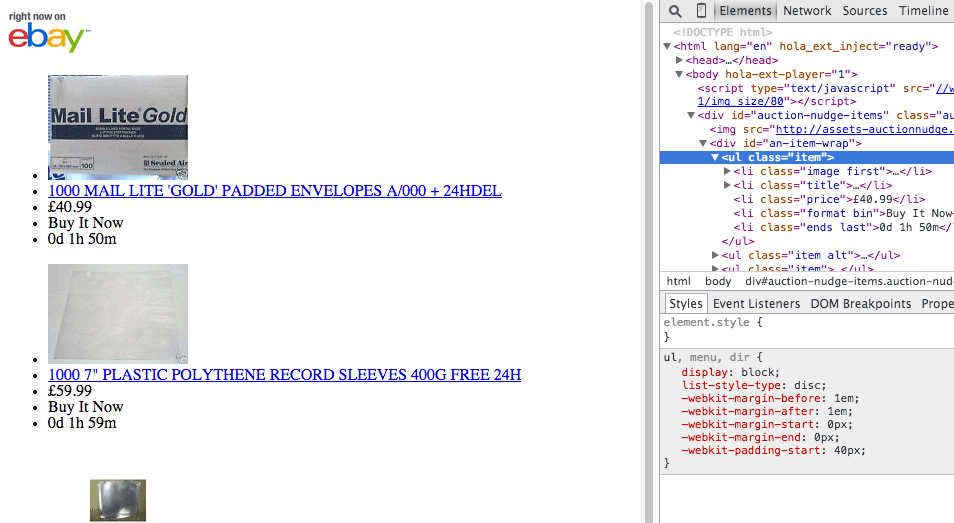
Note – although Auction Nudge does not specify any styles for this theme, some elements will be styled using your browser or website’s stylesheet. For example links will be blue by default.
Know the markup
In order to display the items on your page, once Auction Nudge loads it adds them as HTML elements. Knowing how these elements are structured will allow us to ‘target’ them in our CSS style rules.
The full HTML for the theme is structured like this:
<div class="auction-nudge theme-unstyled" id="auction-nudge-items">
  <img id="an-ebay-logo" src="[ebay_logo_url]">
  <ul id="an-page-top" class="an-page-wrap">
    <li class="an-page-prev" id="an-page-top-prev" data-action="prev" data-page="[previous_page_number]">« Previous</li>
    <li class="an-page-next" id="an-page-top-next" data-action="next" data-page="[next_page_number]">Next »</li>
  </ul>
  <div id="an-item-wrap">
    <ul class="item">
      <li class="image first">
        <div class="image-container">
          <a href="[item_url]">
            <img src="[image_url]">
          </a>
        </div>
      </li>
      <li class="title">
        <a href="[item_url]">Item Title</a>
      </li>
      <li class="price">[currency_symbol]Item Price</li>
      <li class="format bin">Buy It Now</li>
      <li class="ends last">Xd Yh Zm </li>
    </ul>
    <ul class="item alt">
    ... and so on ...
  </div>
  <ul id="an-page-bot" class="an-page-wrap">
    <li class="an-page-prev" id="an-page-bot-prev" data-action="prev" data-page="[previous_page_number]">« Previous</li>
    <li class="an-page-next" id="an-page-bot-next" data-action="next" data-page="[next_page_number]">Next »</li>
  </ul>
</div>
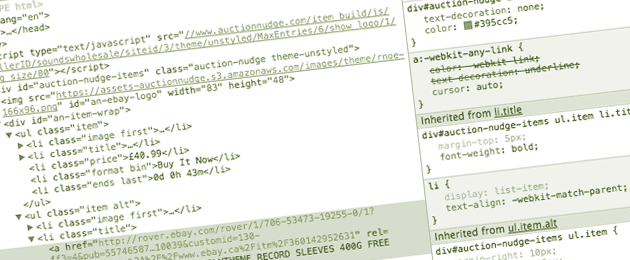
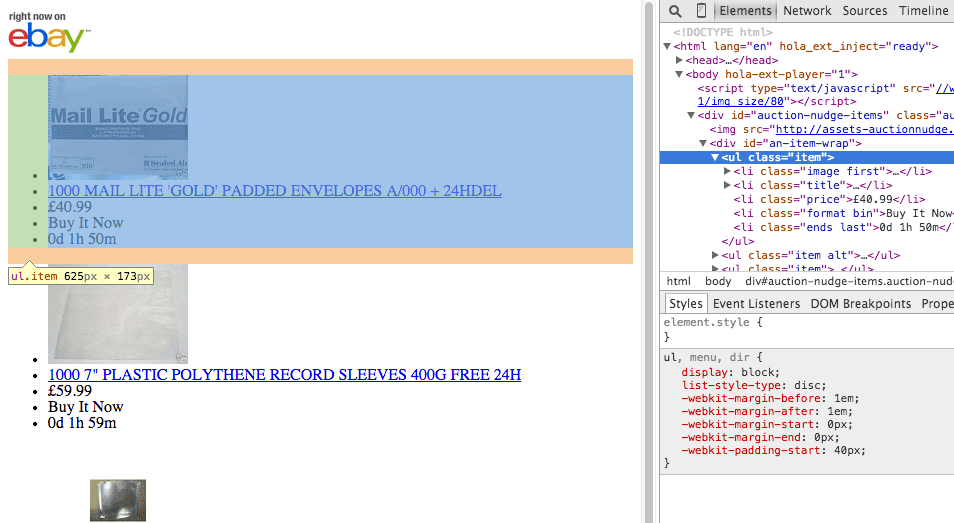
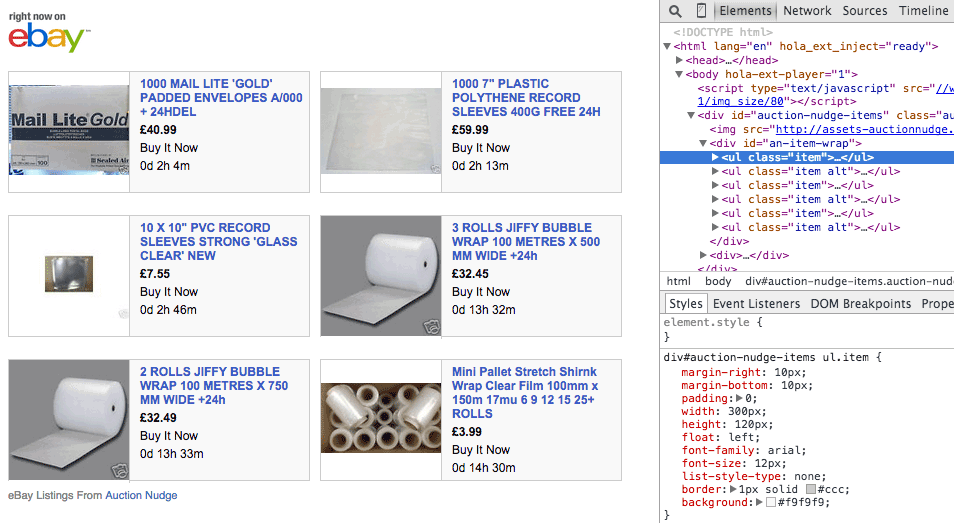
This may at first appear a little overwhelming, but don’t worry – all should be clear soon enough. Using Chrome’s Inspector (your browser probably has one too), we can see how the actual markup looks on the page once Auction Nudge is loaded.
On the left is the content added by Auction Nudge, top right shows the HTML elements that are rendered by the browser and bottom right shows the styles assigned to the markup. Notice the margin, padding and ‘disc’ styles which are added by the browser:
I highly recommend using an inspector like this when working on any web project, as it makes it much easier to see what is going on inside the browser.
Target your styles
Now that we know how the HTML elements are structured on our page, we can write some CSS rules to target them in order to change their appearance. In order to do this, you will need to be able to edit your website’s CSS stylesheet. If you are using the WordPress plugin, in Admin > Settings > Auction Nudge there is a handy box where you can simply paste these rules and they will be added to your page for you.
You can target the elements in CSS using the following format:
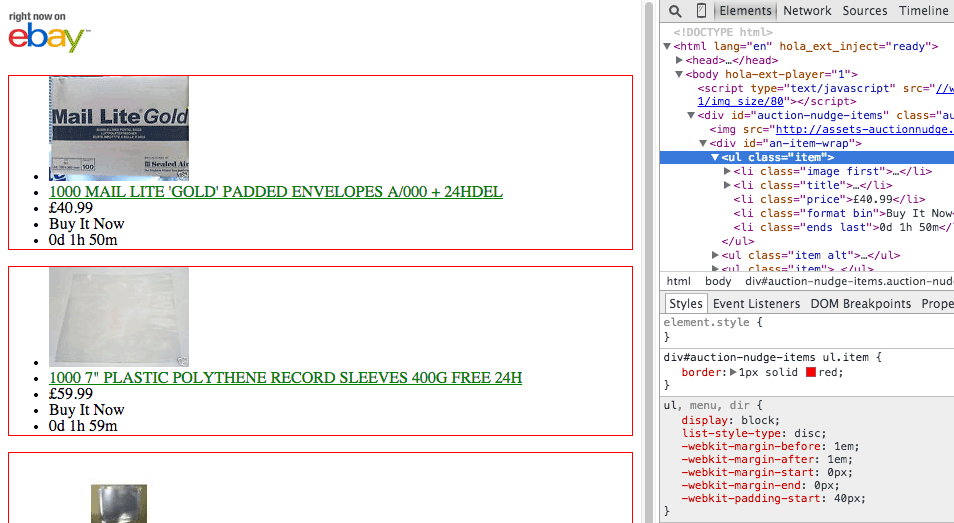
/* Item element */
div#auction-nudge-items ul.item {
  border: 1px solid red;
}
/* Title link element */
div#auction-nudge-items ul.item li.title a {
  color: green;
}
These rules target elements in the Auction Nudge container (div#auction-nudge-items) and add a red border to each item (ul.item) and colour the item title links (li.title a) green (all elements can be targeted this way).
This will give the following result:
Getting creative
Now we know how to target elements and apply styles to them, we can write CSS rules to totally transform the theme. This basic layout below was created using a handful of CSS rules:
You can see this running here (source code here), below I will discuss some of the more important rules.
The following CSS rules will make the item elements ‘float’ to the left, which makes them align side-by-side. Width and height dimensions need to also be set to ensure they align correctly.
/* Item element */
div#auction-nudge-items ul.item {
  float: left; /* Align items side by side */
  width: 300px;
  height: 120px;
}
The following rules align the image to the left of the item details, specify that the image should be at most 120px in width and height and also align vertically when the image is not square.
/* Image element */
div#auction-nudge-items ul.item li.image {
  float: left; /* Align image to left of details */
  display: table; /* Allows us to vertical align */
}
/* Image container */
div#auction-nudge-items ul.item li.image div.image-container {
  /* Vertical align */
  display: table-cell;
  vertical-align: middle;
}
/* The actual image element */
div#auction-nudge-items ul.item li.image img {
  /* Specify maximum dimensions */
  max-width: 120px;
  max-height: 120px;
}
This can be taken as far as you like to integrate fully with your site.
Would you like me to cover any other aspect of customising Auction Nudge? If so, let me know in the comments section below and I will see what I can do.